项目描述(可包含项目介绍、设计思路)
此项目主要是使用了SSD1306 128*64 、DWM3001CDK开发板、安卓手机应用 三部分组成,主要实现功能是在DWM3001CDK 开发板上进行蓝牙slave bleuart 配置,读取模组内的三轴、温度数据,实时显示在oled 屏幕上,手机上通过qt 5.12.2 进行安卓app 开发, 实现最常用的 收发功能,并定制协议可实现 开灯、关灯、读取温度数据等相关信息。
硬件介绍
1.DWM3001CDK 开发板
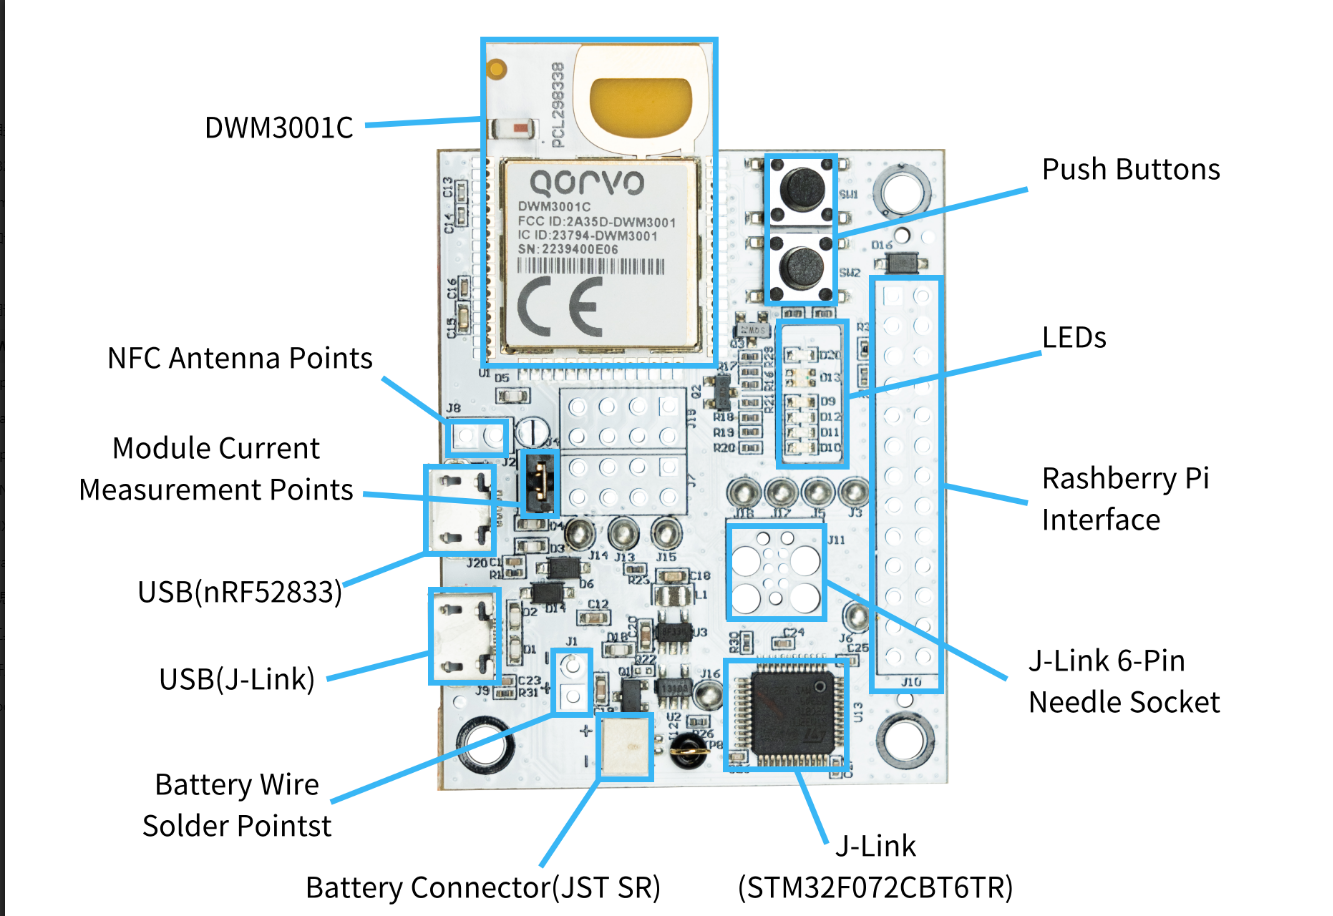
有两个usb 口,一个jlink 下载bootloader ,一个是模块dfu usb 接口,可进行程序开发
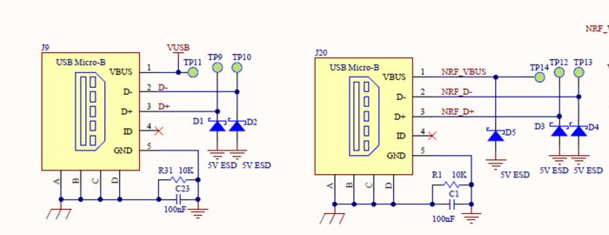
支持多种供电方式: mircousb 、电池等
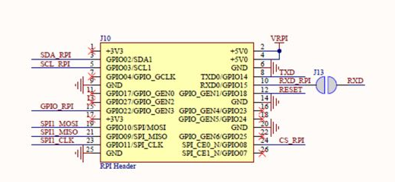
扩展接口: 按照树莓派 GPIO 线序进行排列
led 灯、按键 及模组
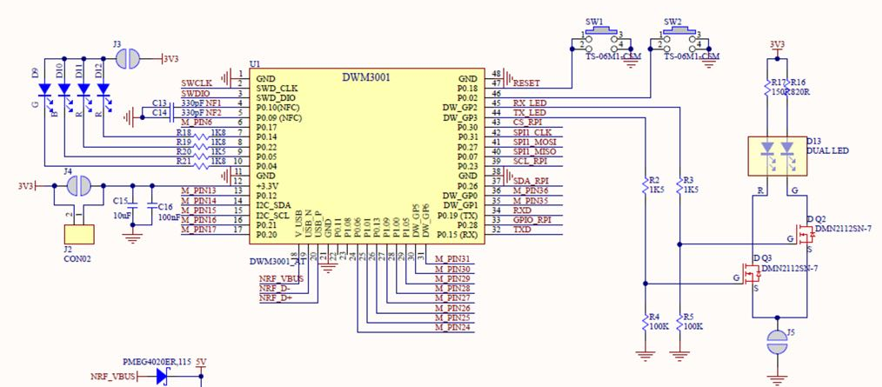
此板卡唯一的缺点就是没有引出3.3V 电源,不方面外接其他功能模块,实际项目中oled 通过 预留的3.3V 焊盘进行连接
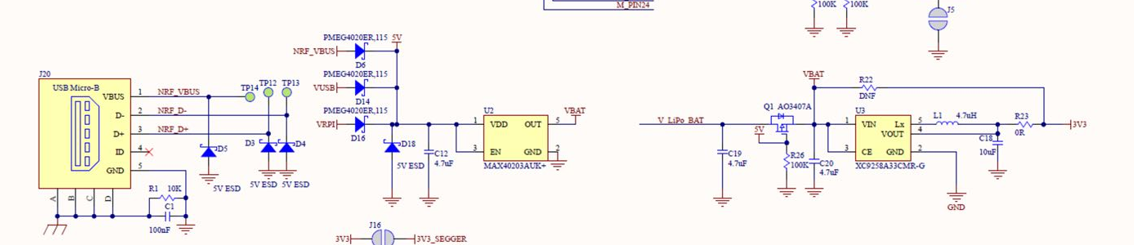
电源转换模块
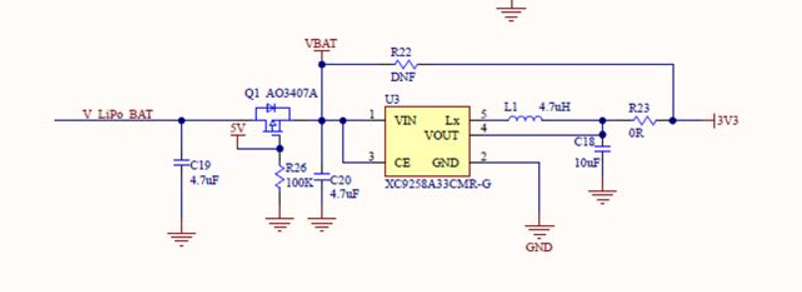
电压使用的是1A 同步降压DCDC ,纹波会比较大,主要是方便进行电池供电
jlink 模块:
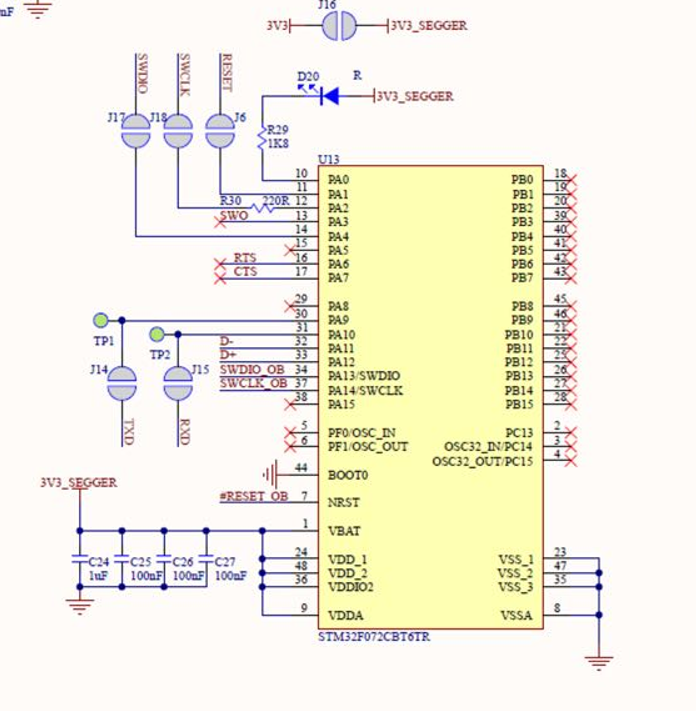
jlink 使用的是STM32F072 ,好多JLINK ob 调试器都使用的此方案,开发板也预留了 串口 和 swd 接口,如果想进行其他mcu 调试,可以将J3 断开,使用预留的焊盘连接其他主控。
2.DWM3001 模块
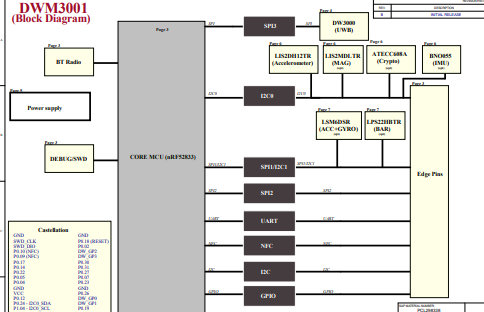
内置一颗 nrf52833 蓝牙mcu
还有一颗LIS2DH12TR 三轴加速度计
同时扩展除SPI1 I2C1 SPI2 UART NFC GPIO 等接口
内置一颗DW3000模块用于UWB 通讯
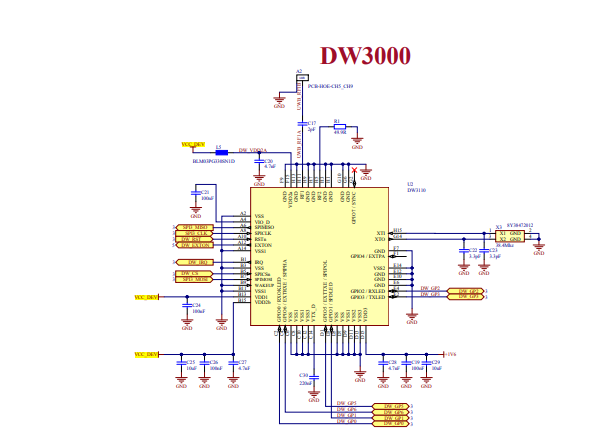
DWM3001C 是一款基于Qorvo DW3110 IC的全集成 UWB 收发模块。 DW3110 IC、nRF52833 BLE SoC、平面 UWB 天线、加速计、电源管理和晶振的集成简化了设计周期。 射频设计经过全面验证、测试和校准。 DWM3001C 支持功耗低,可长期使用电池供电,为 UWB 解决方案的实施提供了成本效益。 DWM3001C 可用于双向测距和 TDoA 应用。 DWM3001C 模块可与 Apple U1 和 U2 芯片互操作。 DWM3001C 的设计符合 FiRa™ PHY 和 MAC 规范,可与其他 FiRa™ 兼容设备互操作。支持两种频段 RF频段5(6.5GHz) RF频段9(8GHz),对应的传输速率是850kbps、6.8Mbps。
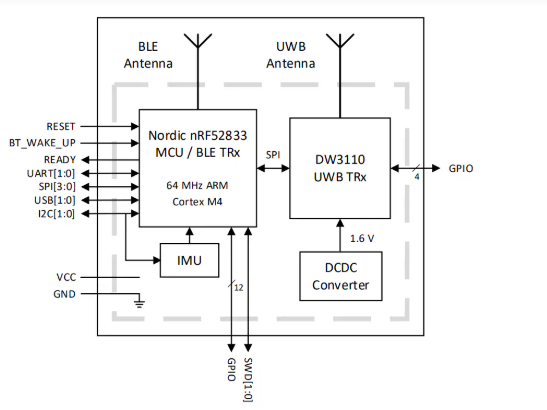
模组的功能框图如下:
软件流程图及各功能对应的主要代码片段及说明
1.oled 驱动
#define OLED_RESET -1
#define SCREEN_WIDTH 128 // OLED display width, in pixels
#define SCREEN_HEIGHT 64 // OLED display height, in pixels
Adafruit_SSD1306 display(SCREEN_WIDTH, SCREEN_HEIGHT, &Wire1, OLED_RESET);
这里使用了Adafruit ssd1306 及wire 库进行驱动
  // SSD1306_SWITCHCAPVCC = generate display voltage from 3.3V internally
  if(!display.begin(SSD1306_SWITCHCAPVCC, 0x3c)) {
    Serial.println(F("SSD1306 allocation failed"));
    for(;;); // Don't proceed, loop forever
  }
这里再初始化时使用0x3c 地址初始化,不知道模块地址的可以使用IIC 扫描程序进行扫描测试
  display.clearDisplay();
    display.setTextSize(1);             // Normal 1:1 pixel scale
    display.setTextColor(SSD1306_WHITE);        // Draw white text
    display.setCursor(15,0);             // Start at top-left corner
    display.println(F("DWM3001C Demo"));
    display.setTextSize(1);
    display.setCursor(2,9);
    display.println(F("Acc [mg]:"));
    display.print(accelX, 1);
    display.println(" x, ");


    display.print(accelY, 1);
    display.println(" y, ");

    display.print(accelZ, 1);
    display.println(" z, ");
    display.print(tempC, 1);
    display.println("C");
    display.display();
显示过程通过 display 句柄进行控制显示位置及字体大小
2.三轴加速度计温度获取
#include "SparkFun_LIS2DH12.h" //Click here to get the library: http://librarymanager/All#SparkFun_LIS2DH12
SPARKFUN_LIS2DH12 accel;       //Create instance
  if (accel.begin(0x19,Wire1) == false)
  {
    Serial.println("Accelerometer not detected. Check address jumper and wiring. Freezing...");
    while (1)
      ;
  }
由于 oled 和模块公用iic ,所以wire1不需要进行初始化了,如果在这之前初始化的话,软件会无法正常启动
3.蓝牙下位机
#include <Adafruit_TinyUSB.h> //comment this line if you are using arduino-nRF5 SDK
#include <bluefruit.h>
#include <Adafruit_LittleFS.h>
#include <InternalFileSystem.h>
这里主要使用了 bluefruit 库进行开发
// BLE Service
BLEDfu  bledfu;  // OTA DFU service
BLEDis  bledis;  // device information
BLEUart bleuart; // uart over ble
BLEBas  blebas;  // battery
实例化四个service
otafu 用于 dfu 模式下的ota升级
bledis 用于获取deice 相关信息,只读模式
bleuart 用于数据通讯 上行或者下发
blebas 用于电池电量显示
 // Setup the BLE LED to be enabled on CONNECT
  // Note: This is actually the default behavior, but provided
  // here in case you want to control this LED manually via PIN 19
  Bluefruit.autoConnLed(true);


  // Config the peripheral connection with maximum bandwidth
  // more SRAM required by SoftDevice
  // Note: All config***() function must be called before begin()
  Bluefruit.configPrphBandwidth(BANDWIDTH_MAX);


  Bluefruit.begin();
  Bluefruit.setTxPower(4);    // Check bluefruit.h for supported values
  //Bluefruit.setName(getMcuUniqueID()); // useful testing with multiple central connections
  Bluefruit.Periph.setConnectCallback(connect_callback);
  Bluefruit.Periph.setDisconnectCallback(disconnect_callback);


  // To be consistent OTA DFU should be added first if it exists
  bledfu.begin();


  // Configure and Start Device Information Service
  bledis.setManufacturer("Adafruit Industries");
  bledis.setModel("Bluefruit Feather52");
  bledis.begin();


  // Configure and Start BLE Uart Service
  bleuart.begin();


  // Start BLE Battery Service
  blebas.begin();
  blebas.write(100);


  // Set up and start advertising
  startAdv();
ble相关初始化,包括灯控制、带宽设置、功率、名称、uuid 等
4.ble 协议设置
  // Forward from BLEUART to HW Serial
  while ( bleuart.available() )
  {
    uint8_t ch;
    ch = (uint8_t) bleuart.read();
    Serial.write(ch);


    int16_t l_tempc =int16_t(tempC*10);
    if(ch==0x55)
    {
      send_buf[0]=0x55;
      send_buf[1]=l_tempc&0xff;
      send_buf[2]=(l_tempc>>8)&0xff;
      l_tempc = accelX;
      send_buf[3]=l_tempc&0xff;
      send_buf[4]=(l_tempc>>8)&0xff;
      l_tempc = accelY;
      send_buf[5]=l_tempc&0xff;
      send_buf[6]=(l_tempc>>8)&0xff;
      l_tempc = accelZ;
      send_buf[7]=l_tempc&0xff;
      send_buf[8]=(l_tempc>>8)&0xff;
      send_buf[9]=0xff;


      bleuart.write(send_buf,10);
    }
    if(ch==0x56)
    {
      led_flag = LOW;
    }
    if(ch==0x57)
    {
      led_flag = HIGH;
    }
  }
上位机下发单字节命令,下位机进行灯控制或信息反馈。
5.qt 安卓app开发
    QBluetoothDeviceDiscoveryAgent *discoveryAgent;
    QBluetoothLocalDevice *localDevice;
    QLowEnergyController *bleController=nullptr;
    QLowEnergyService *bleService=nullptr;
    QLowEnergyCharacteristic writeCharacteristic;
    QLowEnergyDescriptor m_notificationDesc;
这里主要使用QBluetoothDeviceDiscoveryAgent 进行蓝牙service的发现,同时进行ble类型过滤
        QString label="";
        if (info.coreConfigurations()&QBluetoothDeviceInfo::LowEnergyCoreConfiguration)
        {
            label = QString("%1 %2").arg(info.address().toString()).arg(info.name());
        }
        if(label=="")//未发现BLE设备
        {
            return;
        }
        QList<QListWidgetItem *> items = ui->list->findItems(label, Qt::MatchExactly);


        if (items.empty()) {
            m_devices.append(info);
            QListWidgetItem *item = new QListWidgetItem(label);
            QBluetoothLocalDevice::Pairing pairingStatus = localDevice->pairingStatus(info.address());
            if (pairingStatus == QBluetoothLocalDevice::Paired || pairingStatus == QBluetoothLocalDevice::AuthorizedPaired )
                item->setTextColor(QColor(Qt::green));
            else
                item->setTextColor(QColor(Qt::black));
            ui->list->addItem(item);
        }
过滤所有ble 设备,并添加到列表中
    if( localDevice->hostMode() == QBluetoothLocalDevice::HostPoweredOff ) {
        ui->pushButton_openBluetooth->setEnabled(true);
        ui->pushButton_closeDevice->setEnabled(false);
    }else {
        ui->pushButton_openBluetooth->setEnabled(false);
        ui->pushButton_closeDevice->setEnabled(true);
    }


    if( localDevice->hostMode() == QBluetoothLocalDevice::HostDiscoverable ) {
        ui->checkBox_discoverable->setChecked(true);
    }else {
        ui->checkBox_discoverable->setChecked(false);
    }
localdevice 用于检测本地蓝牙状态
当点击对应的下位机ble 蓝牙名称时,建立连接,实例化QLowEnergyController
  QString text = item->text();


    int index = text.indexOf(' ');


    if (index == -1)
        return;


    QBluetoothAddress address(text.left(index));
    QString name(text.mid(index + 1));
    //socket->connectToService(address, QBluetoothUuid(QBluetoothUuid::SerialPort) ,QIODevice::ReadWrite);
   // socket->connectToService(address, QBluetoothUuid(serviceUuid) ,QIODevice::ReadWrite);


    if(bleController)
    {
        bleController->disconnectFromDevice();
        delete  bleController;
    }
    bool find_flag =false;
    for (auto device : m_devices)
    {
        qDebug()<<"address find"<<device.address().toString();
        if (device.address()==address)
        {
            find_flag =true;
            cur_device = device;
            break;
        }
    }
    if(find_flag)
    {
        QMessageBox::information(this,tr("Info"),tr("The device is connecting..."));
    }
    else
    {
        QMessageBox::information(this,tr("Info"),tr("Not found address"));
        return;
    }


    bleController = QLowEnergyController::createCentral(cur_device,this);
    bleController->setRemoteAddressType(QLowEnergyController::PublicAddress);
这里只会与指定的uuid 进行连接
        if(m_found_uuid)
        {
            bleService = bleController->createServiceObject(serviceUuid,this);
        }
        if(bleService)
        {
            connect(bleService, &QLowEnergyService::stateChanged, this,[=](QLowEnergyService::ServiceState s)
            {
                switch (s) {
                case QLowEnergyService::DiscoveringServices:
                    qDebug()<<tr("Discovering services...");
                    break;
                case QLowEnergyService::ServiceDiscovered:
                {
                    qDebug()<<tr("Service discovered.");


                    const QLowEnergyCharacteristic hrChar = bleService->characteristic(charUuid);


                    for (auto chars : bleService->characteristics())
                    {
                        qDebug()<<"get char list:"<<chars.uuid();
                        qDebug()<<"can valid"<<chars.isValid();
                        if(chars.isValid())
                        {
                            writeCharacteristic = chars;


                            m_notificationDesc = chars.descriptor(QBluetoothUuid::DescriptorType::ClientCharacteristicConfiguration);
                            if(m_notificationDesc.isValid())
                            {
                               bleService->writeDescriptor(m_notificationDesc, QByteArray::fromHex("0100"));
                            }
                        }


                    }


                    break;
                }
                default:
                    //nothing for now
                    break;
                }//end switch
            });
发现完成后会实例化service ,通过service 指定读写的特征值
   connect(bleService,&QLowEnergyService::characteristicChanged,this,[=](const QLowEnergyCharacteristic &c, const QByteArray &value)
            {


                if(c.uuid()!=charUuid)
                {
                    qDebug()<<"not macth uuid ,is"<<c.uuid().toString();
                }
                comStr.append(value.toHex());
                qDebug() <<"rec data is: "<< comStr;
                qDebug() <<"The comStr length is: " << comStr.length();
                ui->textBrowser_info->append(comStr);
                comStr.clear();


                qDebug()<<"get data"<<value;
                if(value.size()==10)
                {
                    if((value.at(0)==0x55)&&(value[9]==0xff))
                    {
                        recvList.clear();
                        recvList.append(value.at(1)+(value.at(2)<<8));//temp
                        recvList.append(value[3]+(value[4]<<8));//x
                        recvList.append(value[5]+(value[6]<<8));//y
                        recvList.append(value[7]+(value[8]<<8));//z


                        ui->temp_label->setText(QString("%1.%2℃").arg(recvList.at(0)/10).arg(recvList.at(0)%10));
                    }


                }


            });
            connect(bleService,&QLowEnergyService::descriptorWritten,this,[=](const QLowEnergyDescriptor &d, const QByteArray &value)
            {


                qDebug() << "characteristicChanged write state change::"<<d.uuid();
                qDebug() << "value length::" << value.length();
                qDebug() << "value ::" << value;


            });
            bleService->discoverDetails();


        }//end if bleseivce
解析下发值和回传的值
功能展示图片及说明
1.安卓app 界面设计

1.左侧列表用于放置扫描BLE address 及名称,右侧列表用于接收下位机发送hex 原始数据 用于调试
- Open Close 用于开启和关闭蓝牙
- clear 用于清除接收数据
- Read_Temp 用于读取下位机的实时温度
- Led On 用于点亮板子上的绿灯
- Led Off 用于关闭板子上的绿灯
2.开发板硬件连接
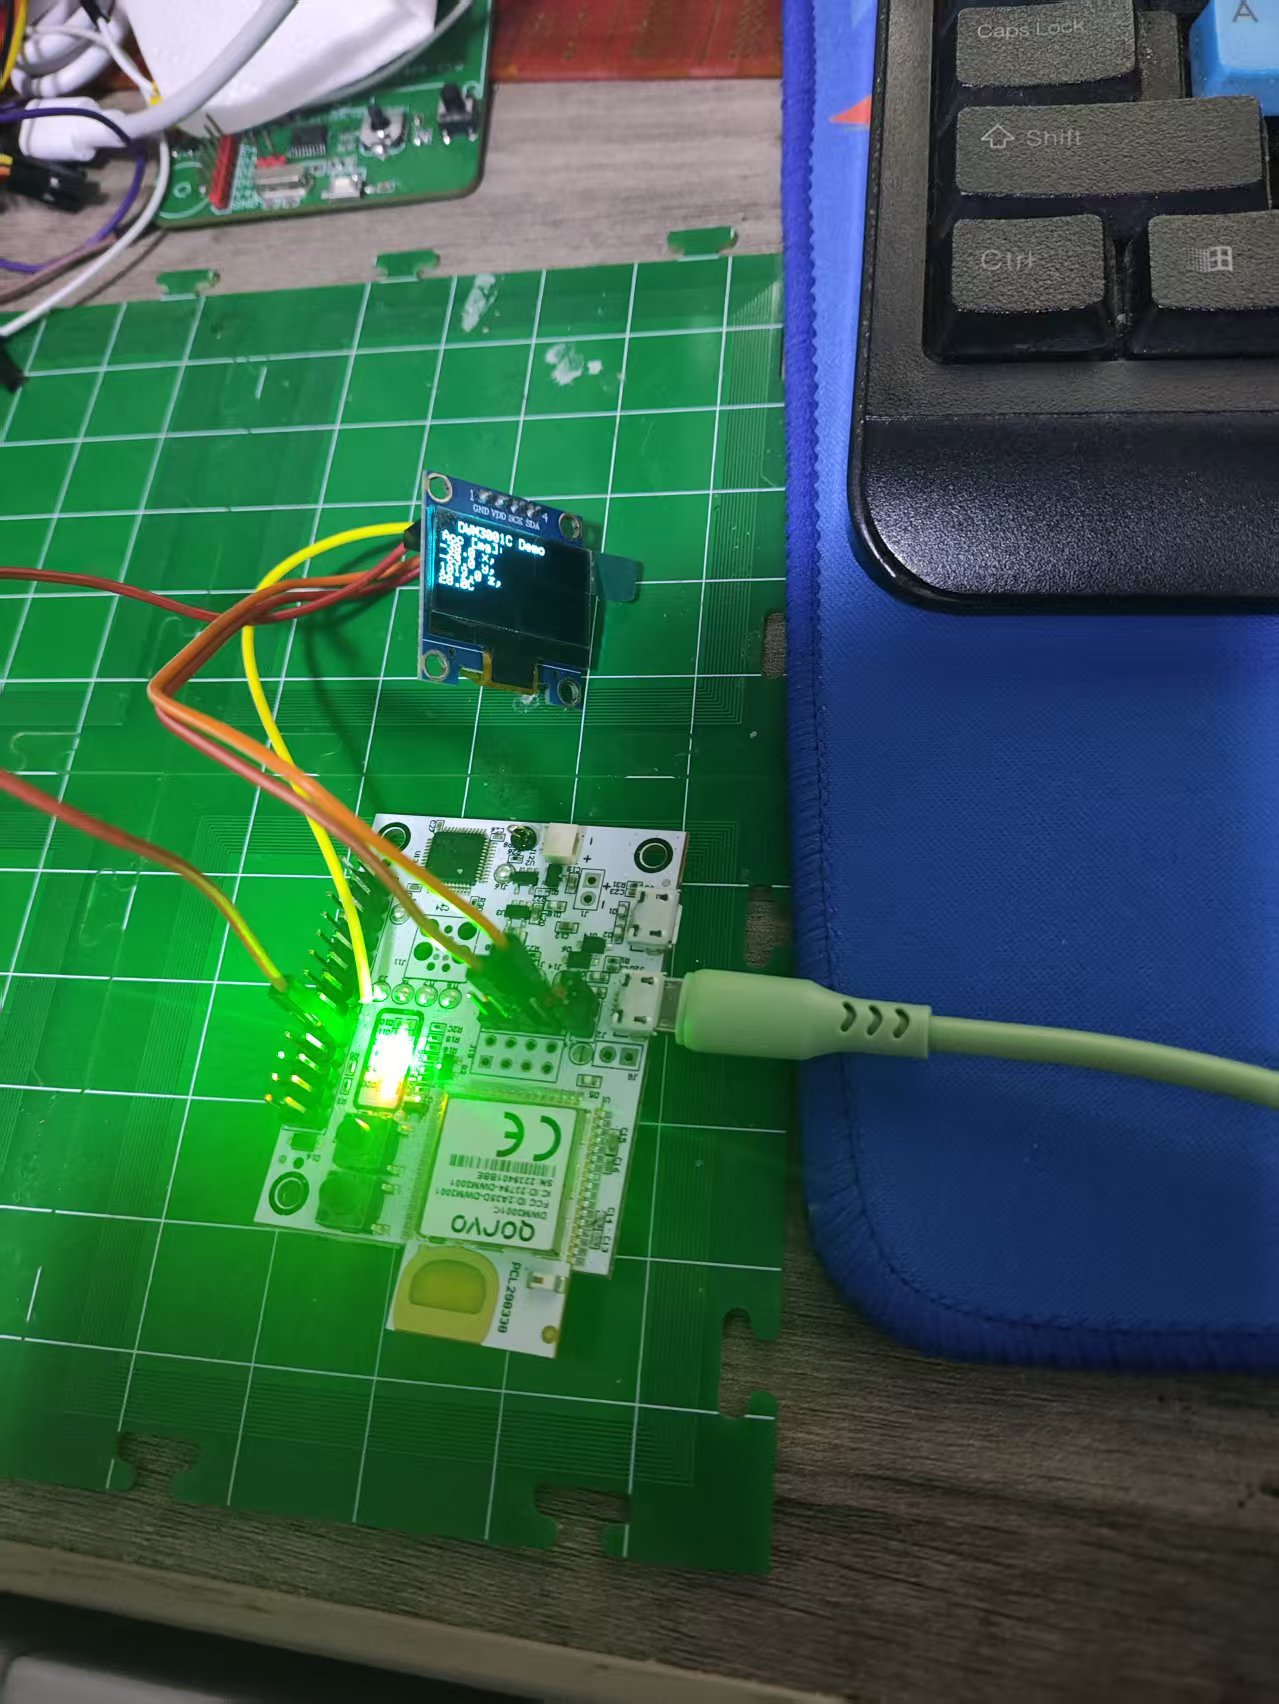
使用IIC 连接OLED 屏幕,用于实时显示三轴数据及温度信息,动态刷新
项目中遇到的难题和解决方法
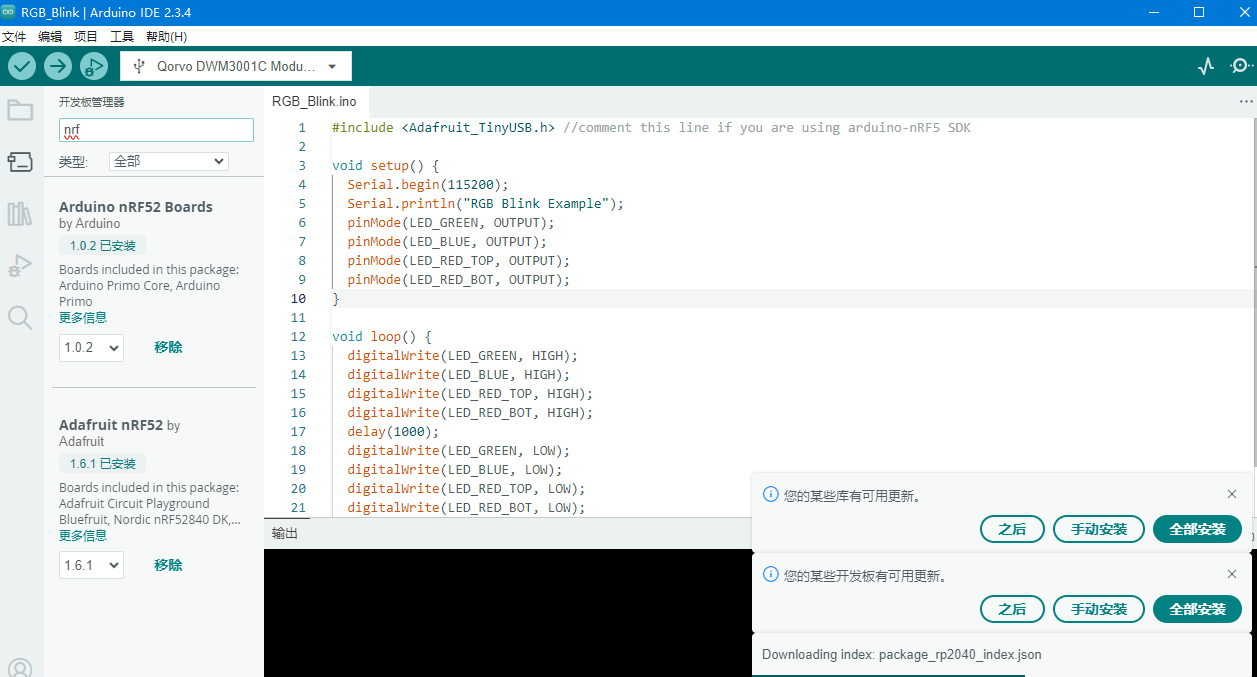
1.最初想使用platformio 进行开发,使用发现库怎么也下载不下来,后来尝试群里的方法从arduino

下载集成使用,新版的ide 终于支持跳转了,不容易呀,但是没法看源码后续建议集成下这个功能
2.蓝牙APP 开发过程中,不好确定设备的uuid 无法进行控制,后来使用BLE 调试宝确定相应的uuid ,后续service 和描述符都加到界面显示上,方便进行选择
对本活动的心得体会(包括意见或建议)
1.感谢硬禾提供此次活动,建议频次和板卡数量多些,周期相对灵活些,方便大家更多参与进来
2.后续完善下蓝牙上位机,可实现经典蓝牙及ble 蓝牙通讯及控制


 qqlovolpp